English
 عربى
عربى 简体中文
简体中文
Troubleshooting common issues with condensing units, such as refrigerant leaks or compressor malfunctions, involves a systematic approach. Here's a step-by-step guide:
Check Refrigerant Levels: Using a high-quality refrigerant pressure gauge, meticulously measure the pressure levels within the condensing unit's refrigeration system. Take readings at both the low and high-pressure sides of the system to obtain a comprehensive understanding of its operating conditions. Compare the obtained pressure readings against the manufacturer's specifications to ensure they fall within the recommended range for your specific condensing unit model and refrigerant type. Low-pressure readings may indicate a refrigerant leak or insufficient charge, necessitating further investigation and potential recharging of the system. Conversely, high-pressure readings could signify various issues such as a clogged filter, overcharging of refrigerant, or a malfunctioning compressor, all of which require careful diagnosis and remediation.
Inspect Refrigerant Lines: Thoroughly inspect the entirety of the refrigerant lines, meticulously checking for any signs of leakage or damage. Begin by visually examining the lines for any visible traces of oil residue, which often indicate the presence of refrigerant leaks. If suspected leaks are identified, utilize a specialized leak detection tool or a solution of soapy water to pinpoint their exact location more accurately. Carefully inspect all connections, joints, fittings, and valves along the refrigerant lines, tightening or repairing any loose or damaged components as necessary. Once leaks have been repaired, it's crucial to evacuate and recharge the system with the appropriate refrigerant type and quantity, following manufacturer guidelines and industry practices.
Examine Electrical Connections: When inspecting the electrical connections within the condensing unit, adopt a meticulous approach to ensure the integrity and safety of the system. Begin by carefully examining each electrical connection and terminal for any signs of corrosion, oxidation, or overheating, which can indicate potential issues with conductivity or insulation. Utilize a multimeter to measure the continuity of electrical circuits and verify the absence of any open or short circuits. Test electrical components such as capacitors, relays, contactors, and switches for proper functionality, ensuring they operate within their specified parameters. Inspect the condition of wiring insulation and cable sheathing, replacing any damaged or deteriorated components promptly to prevent electrical faults or safety hazards.
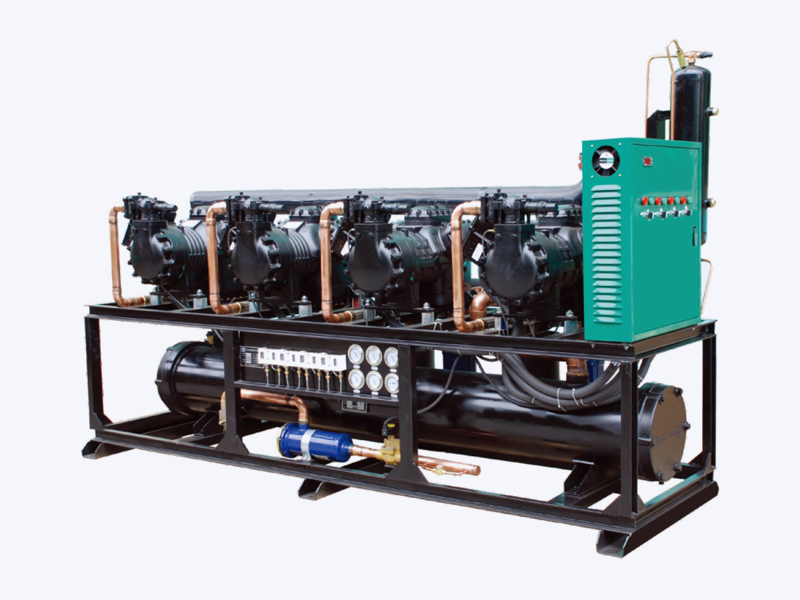
Test Compressor: Assessing the performance and condition of the compressor is a critical aspect of troubleshooting condensing unit issues. Begin by visually inspecting the compressor for any signs of physical damage, such as dents, cracks, or oil leakage, which can indicate internal faults or mechanical wear. Utilize a multimeter to measure the continuity of the compressor windings and verify that they fall within the specified resistance range. Monitor the voltage supplied to the compressor during operation, ensuring it remains stable and consistent. Listen attentively for any abnormal sounds emanating from the compressor, such as grinding, knocking, or rattling noises, which may indicate internal mechanical damage or wear. If the compressor fails to start, runs intermittently, or exhibits other irregularities, further diagnostic testing and potentially replacement may be necessary to restore proper functionality and efficiency to the condensing unit.
Semi-Hermetic Compressor Parallel Condensing Unit